
Virtual Machine for LAMP Development
This blog post addresses a common scenario — a local LAMP development environment on your Windows or OS X computer. You could use XAMPP on either Windows or OS X, MAMP on OS X or native Apache in OS X. Here, we will create a Linux virtual machine with Samba configured to share the Virtual Machine file system with the host computer. We will also create virtual hosts, install and configure WordPress and Xdebug.
First thing you will need is Virtual Machine software. For my Virtual Machine, I chose to install the free VMware Player. If your host operating system is OS X, you can install VirtualBox if you do not want to purchase VMware Fusion or Parallels. You could also use VirtualBox on a Windows host instead of VMware if you prefer.
Next, you will need to create a Linux virtual machine. I decided to Download Ubuntu Server 32 bit since it is compatible with the intel processor of my host computer.
Install SSH
After creating a new VM and installing Linux, time to get our dev environment setup. Install SSH so we can run commands from the host. Later we will use ssh to to tunnel the Xdebug connection from the VM back to the host.
# update the distro
$ apt-get update
$ apt-get upgrade -y

# install SSH
$ sudo apt-get -y install openssh-client openssh-server
Get the IP address of the Linux virtual machine.
# lookup inet addr ip
$ ifconfig eth0
From the host, open a terminal and SSH into the virtual machine. In a Windows host, you can use Cygwin, PuTTY or a Git Bash.
$ ssh jim@192.168.59.129
...
jim@192.168.59.129's password:
Welcome to Ubuntu 12.04.3 LTS (GNU/Linux 3.8.0-29-generic i686)

    * Documentation:  https://help.ubuntu.com/
Last login: Sat Nov  2 12:55:45 2013
jim@ubuntu:~$
Install LAMP server
Read my blog post for more on how to install the LAMP server and phpMyAdmin: Mint LAMP Development Environment
# install LAMP server
$ sudo apt-get install lamp-server^
Restart Apache and test the web server root URL from a host browser using the virtual machines IP address, e.g., http://192.168.59.129/.
$ sudo /etc/init.d/apache2 restart
Virtual Hosts
# edit the Apache config
$ sudo nano /etc/apache2/apache2.conf
In apache2.conf, add these virtual host settings below the files node
NameVirtualHost *:80

<VirtualHost *:80>
    DocumentRoot /var/www
    ServerName www.ubuntu.vm
    ServerAlias ubuntu.vm
</VirtualHost>

<VirtualHost *:80>
    DocumentRoot /var/www/wordpress
    ServerName www.wordpress.vm
    ServerAlias wordpress.vm
</VirtualHost>
Edit your hosts file in your host operating system to map to the virtual hosts you specified in the Apache config of the Linux virtual machine.
192.168.59.129  ubuntu.vm
192.168.59.129  wordpress.vm
Since we have set the hosts file to map 192.168.59.129 to ubuntu.vm, once you disconnect your current ssh session Ctrl+ D, you will need to use the host alias you specified in the hosts file to reconnect.
ssh jim@ubuntu.vm
Samba Network Share
You can use Samba to share the /var folder in you virtual machine.
# install Samba
$ sudo apt-get install samba
Linux system permissions take precedence over Samba permissions. For example if a directory does not have Linux write permission, setting samba writeable = Yes will not allow to write to shared directory / share.
# edit Samba config
$ sudo nano /etc/samba/smb.conf
####### Authentication #######
    security = user

# bottom of smb.conf
[etc]
    path = /etc
    browsable = yes
    read only = no
    create mask = 0755
    admin users = jim

[home]
    path = /home
    browsable = yes
    read only = no
    create mask = 0755
    admin users = jim

[var]
    path = /var
    browsable = yes
    read only = no
    create mask = 0755
    admin users = jim
Ctrl+ C to exit nano, press Y to save and return to write your changes to the file.
Install the PAM authentication module for Samba which will sync the system users to the Samba user database.
# Install libpam-smbpass package
$ sudo apt-get install libpam-smbpass

# restart Samba for the new settings to take effect
$ sudo restart smbd
$ sudo restart nmbd

# set user jim as the owner of share directory
$ sudo chown -R jim /var/www
For OS X, open Finder, select Go > Connect to Server ⌘ command+ K. Enter the server address: smb://ubuntu.vm and select Connect
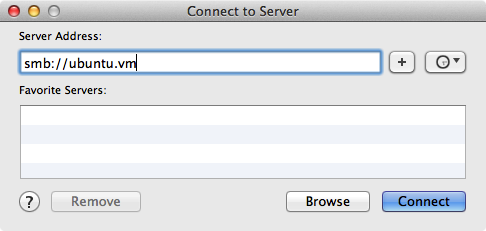
OS X - Connect to Server Dialog
For Windows, select Run from the Start menu or open Windows Explorer and enter:
\\ubuntu.vm\www
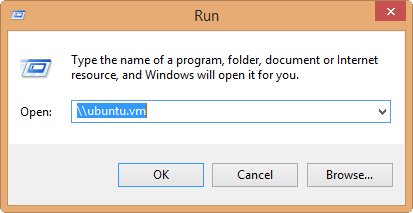
Windows Run Dialog
Server Time Synchronisation
Server time is likely to become inaccurate in our development scenario. We can use Ubuntu’s NTP server and NTP’s server pool to keep the server datetime accurate.
# install ntp
$ sudo apt-get install ntp

# edit /etc/ntp.conf
$ sudo nano /etc/ntp.conf
# add these two lines
server ntp.ubuntu.com
server pool.ntp.org

# change server time zone
$ sudo dpkg-reconfigure tzdata
Enabling Module Rewrite
The mod_rewrite Apache module is a rule-based rewriting engine to rewrite requested URLs. It is very useful for genarating SEO friendly URLs.
# enable the module
$ sudo a2enmod rewrite

# restart apache to activate the configuration change
$ sudo service apache2 restart
Install WordPress
# download the latest WordPress to a downloads directory
$ mkdir ~/downloads
$ cd ~/downloads

$ wget http://wordpress.org/latest.tar.gz

# -z : Uncompress the resulting archive with gzip command.
# -x : Extract to disk from the archive.
# -v : Produce verbose output i.e. show progress and file names while extracting files.
# -f latest.tar.gz : Read the archive from the specified file.
# -C : To change the directory (current directory is default)

# this will create /var/www/wordpress since the archive root directory is wordpress
$ sudo tar -zxvf latest.tar.gz -C /var/www

# make yourself the owner
sudo chown jim /var/www/wordpress
Create Database
Create MySql database, user and grant permissions in one line.
base_user is typically root
base_user_pass is password for base_user (no space between -p and base_user_pass is important)
mysql -u base_user -pbase_user_pass -e "create database new_db; GRANT ALL PRIVILEGES ON new_db.* TO new_db_user@localhost IDENTIFIED BY 'new_db_user_pass'"
phpMyAdmin
If phpMyAdmin is installed, you can use it to create the wordpress database as described in this next section. Read my earlier blog post if you need help doing this, Mint LAMP Development Environment
In the browser, goto http://ubuntu.vm/phpmyadmin/. Select the Databases tab and under “Create new database”, enter in a database name such as “wordpress”, and select Create. Collation will automatically be assigned by MySQL when the database tables are created, during the WordPress installation.
# copy WordPress sample config
$ cd /var/www/wordpress
$ cp wp-config-sample.php wp-config.php
In the browser, goto http://wordpress.vm and start the installation. If you need to manually edit the wp-config.php file, you can do so with nano.
$ nano wp-config.php
// ** MySQL settings - You can get this info from your web host ** //
/** The name of the database for WordPress */
define('DB_NAME', 'database_name_here');

/** MySQL database username */
define('DB_USER', 'username_here');

/** MySQL database password */
define('DB_PASSWORD', 'password_here');

/** MySQL hostname */
define('DB_HOST', 'localhost');
After saving wp-config, complete the WordPress installation at http://wordpress.vm
You can backup the MySql database using mysqldump within your ssh session. For example, replace mysql_username with your username and mysql_password with your password:
$ mysqldump -h localhost -u mysql_username -pmysql_password wordpress > /home/wordpress-$(date +"%Y-%m-%d").sql
WordPress Revisions Cleanup
Run this sql query in phpMyAdmin to delete all revisions from each post, including all of its meta data.
DELETE a,b,c
FROM wp_posts a
LEFT JOIN wp_term_relationships b ON (a.ID = b.object_id)
LEFT JOIN wp_postmeta c ON (a.ID = c.post_id)
WHERE a.post_type = 'revision'
Xdebug
$ sudo apt-get install php5-xdebug
Check Xdebug
$ php --version

PHP 5.3.10-1ubuntu3.8 with Suhosin-Patch (cli) (built: Sep  4 2013 20:05:42)
Copyright (c) 1997-2012 The PHP Group
Zend Engine v2.3.0, Copyright (c) 1998-2012 Zend Technologies
    with Xdebug v2.1.0, Copyright (c) 2002-2010, by Derick Rethans
Configure Xdebug
$ sudo nano /etc/php5/conf.d/xdebug.ini
Add the following xdebug config values after the zend_extension path value so it looks like this.
zend_extension=/usr/lib/php5/20090626+lfs/xdebug.so
xdebug.remote_enable=1
xdebug.remote_handler=dbgp
xdebug.remote_mode=req
xdebug.remote_host=127.0.0.1
xdebug.remote_port=9000
When debugging from the host computer, use ssh to tunnel the debug-connection back to it.
# ssh remote port forwarding
ssh -R 9000:localhost:9000 jim@ubuntu.vm
Using the -R argument tells ssh to listen on TCP port 9000 on the ubuntu server and forward it back through the ssh connection to the TCP port specified (localhost:9000). So from Xdebug’s perspective on the Ubuntu server, it is talking to localhost on the local computer.
More info: Mint LAMP Development Environment – Part Two | Xdebug
Other PHP debugging options
You could use the FirePHP Extension for Firefox to log to your Firebug Console using a simple PHP method call. There is also a SublimeTextXdebug package for Sublime Text.
If all you have is ssh and nano
<?php var_dump(__FILE__, __LINE__, $_REQUEST); ?>
or
<?php
echo '<pre>';
print_r( $somevariable );
echo '</pre>';
?>