
Going from Windows to OS X
› After twenty plus years using Microsoft and Windows dating back to DOS 6.1 and Windows 3.1, I am learning how to make the switch to OS X. One thing I had to get used to was how to bring up context menus that I would always invoke by right clicking an object in Windows. To right click in OS X on the MacBook Pro, use the Multi-Touch trackpad and tap with two fingers at once. Another was the Delete key functions the same as backspace on a PC. No Home and End keys on the Mac took some getting used to as well, command and cursor key combo’s did the trick. A majority of shortcuts can be replicated by simply replacing what was done with the Ctrl key on a PC with the command key in OS X.
Windows and OS X Keyboard Comparison
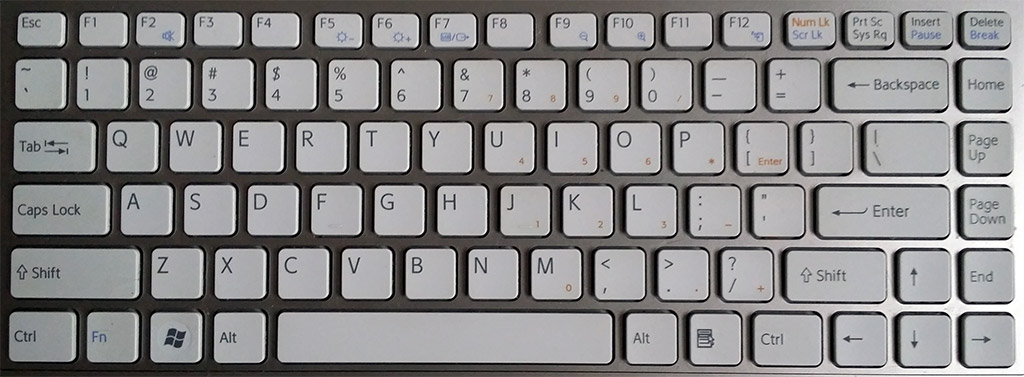
Windows/PC Keyboard - Sony VAIO FW290

MacBook Pro Keyboard
Here is a table of my frequently used keyboard shortcuts for each OS.
| OS X | Windows | |
|---|---|---|
| Cut | ⌘ command+X | Ctrl+X |
| Copy | ⌘ command+C | Ctrl+C |
| Cycle Tabs | control+tab | Ctrl+Tab |
| Cycle Windows | ⌘ command+tab | Alt+Tab |
| Cycle Windows Current App |
⌘ command+~ | |
| End of Document | ⌘ command+↓ | Ctrl+End |
| End of Line | ⌘ command+→ or: control+E |
End or: Fn+→ |
| Force Quit Applications |
⌘ command+option+esc | Ctrl+Shft+Esc |
| Reload Webpage | ⌘ command+R | Ctrl+R or: F5 |
| Start of Document | ⌘ command+↑ | Ctrl+Home |
| Start of Line | ⌘ command+← or: control+A |
Home or: Fn+← |
| Page Down | fn+↓ | Page |
| Page Up | fn+↑ | Page |
| Paste | ⌘ command+V | Ctrl+V |
| Select Words | shift+option+→ | Shift+Ctrl+→ |
| Show Desktop | fn+F11 | Win+D |
| Spotlight / Run | ⌘ command+space | Win+R |
| Webkit Dev Tools | ⌘ command+option+I | Ctrl+Shift+I |
Key Mac Symbols
“⌘ command”
⌥ option / alt
⌃ control
⇧ shift
Lock Screen
After enabling the lock screen in System Preferences > Security & Privacy by checking require password after sleep or screensaver begins …
For external keyboards with an Eject key use control+shift+eject
For keyboards without an Eject key, like the MacBook Air and MacBook Pro Retina, use control+shift+power
Screen Capture, OS X
⌘ command+shift+3
Take a picture of part of the screen
⌘ command+shift+4 and then drag the crosshair pointer to select the area. Continue to press the mouse button, release the keys, and then press Shift, Option, or the Space bar while you drag to resize the selection area. When you are ready to take a picture, release the mouse button.
To cancel, press Escape before you release the mouse button.
Terminal
base64 files
To base64 encode a file. Typically a font or image to inline into a CSS file. Add this function into your .bash_profile.
# usage: base64 foo.png
function base64() {
openssl base64 < $1 | tr -d '\n' | pbcopy && printf "\n\e[0;31m -- base64 string copied to clipboard -- \e[0m\n"
}
Compress (ZIP) Files
# to create a zip archive of the entire folder named myproject into myproject.zip
# and exclude .DS_Store, node_modules and .git directory
# cd to the directory that has the myproject folder, then
zip -r myproject.zip myproject --exclude "*.DS_Store" --exclude "*.git*" --exclude "*node_modules*"
Command History
Don’t search history by grepping ~/.bash_history, or repeatedly hitting the up arrow, instead use control+R
control+U clear line
control+K clear everything after the cursor
control+A move cursor to the beginning
control+E move cursor to the end
Change Owner and/or Group
# chown USER DIR/FILE
sudo chown jimfrenette /usr/local

# chgrp GROUP DIR/FILE
sudo chgrp staff /usr/local

# chown USER:GROUP DIR/FILE
sudo chown jimfrenette:staff /usr/local
Disk Maintenance
sudo periodic daily weekly monthly
Download Files
curl -O http://code.jquery.com/jquery-1.10.2.min.js
Finder
# open Finder in current directory
open .
To go to a Finder location in terminal, type “cd " (space after cd) and then drag your folder from Finder into the terminal session and press enter.
Toggle hidden file view:
⌘ command+shift+.
Change Default setting to show hidden files and folders. In terminal, enter the following command: defaults write com.apple.finder AppleShowAllFiles YES. Then relaunch finder for the changes to take effect: hold option + right click on the Finder icon in the dock, click Relaunch.
IP Config
# ethernet adapter
ipconfig getifaddr en0

# wifi adapter
ipconfig getifaddr en1

# external
curl ipecho.net/plain; echo

# grep example
ifconfig |grep inet
Hosts File Edits
sudo nano /private/etc/hosts
Launch Apps
sudo open /Applications/FileZilla.app
Print Working Directory
pwd
Shutdown / Restart
# shut down immediately
sudo shutdown -h now

# restart immediately
sudo shutdown -r now

# restart in 1 minute
sudo shutdown -r +1
SSH
control+D to logout of SSH session
Symbolic Links - symlinks
Symbolic link files contain path metadata of the target file or directory. If you move the target file, the symlink will break. Note that ~/ will target the current users home directory. This example creates a symlink to the Photos directory in the Downloads directory.
# /target /symlink
ln -s ~/Dropbox/Photos ~/Downloads
Web Server
Start a simple web server at the root of any folder by navigating to the folder. This example will create a web server with a base URL http://localhost:8000
python -m SimpleHTTPServer 8000
If you want to use port 80, simply leave off the port number that follows the SimpleHTTPServer command. Ctrl+C to stop the server
Other Useful OS X Tips
Activity Monitor
Use Spotlight (command + spacebar) and start typing Activity Monitor, select it to monitor what is going on with your system.
Finding Files
While in Finder, select Edit > Find (command + F). Then click the plus button to the right of the search window to add a filter. Select “other” in the first drop-down menu and select “System files”. Now select “System Files” which is now an available option in the first drop-down. Select “are included” in the second drop-down and enter your search term.
I find searching for text inside of files hit or miss with Finder. The free Text Wrangler app does a nice job searching for text strings within files. Select Search > Multi File Search (up arrow + command + F). For Windows, my favorite free file search utility is Agent Ransack.
URL Shortcuts
Creating a internet shortcut that can be opened in both OS X and Windows is as easy as creating a text file and saving it with the .url extension
[InternetShortcut]
URL=//jimfrenette.com/2013/10/going-from-windows-to-os-x/
IconIndex=0
Resources
OS X Startup Options & Boot Modes
Single User Mode
Single user mode boots OS X into a single superuser and does not enter the GUI. The terminal can be used for advanced troubleshooting, hard drive repair, file system changes etc.. It can also be used to make OS X restart as if a fresh install in order to go through the process of creating an administrator user account.
Boot into Single User mode by pressing the ⌘ command+S keys when the system is started.
Creating an Admin Account
After the sytem has booted into single user mode, mount the startup drive to access to access those files.
/sbin/mount -uw /
When OS X boots, it checks if the .applesetupdone file exists. OS X creates this empty file when Setup Assistant is completed. Remove this file so OS X will presume that Setup Assistant has not run when it is rebooted. When the system is rebooted, Setup Assistant will launch which includes creating a new admin account.
Remove .applesetupdone / Reboot
rm /var/db/.applesetupdone

reboot
Recovery Mode
Boot into Recovery mode by pressing the ⌘ command+R keys when the system is started.
Files
Toggle hidden files view
⌘ command+shift+.
View hidden files and folders:
defaults write com.apple.finder AppleShowAllFiles -boolean true ; killall Finder
Hide files and folders [default]
defaults write com.apple.finder AppleShowAllFiles -boolean false ; killall Finder
When cleaning up the disk, sometimes apps leave files in these locations
System Preferences > Login Items > Users & Groups > Login Items
~/Library/Preferences/
/Library/Preferences
~/Library/Preferences
/Launch Agents
~/Library/Launch Agents
/Launch Daemons
~Library /Launch Daemons
Java
Uninstall
sudo rm -rf /Library/Internet\ Plug-Ins/JavaAppletPlugin.plugin
sudo rm -rf /Library/PreferencePanes/JavaControlPanel.prefPane
sudo rm -rf /Library/Application\ Support/Oracle/Java/
sudo rm -rf /Library/Java/JavaVirtualMachines
SIP
In OS X versions that have System Integrity Protection (SIP), for some software development utilities it may need to be turned off.
How to turn off System Integrity Protection
- Restart
- Hold down ⌘ command+R to reboot into Recovery Mode
- Click Utilities
- Select Terminal
- Run
csrutil disable - Restart
Turn SIP back on with
csrutil enablein the recovery mode terminal.