
DNN Windows Client
This tutorial will walk you through the creation of a basic Windows Forms application to test remote authentication and authorization when communicating with a DNN CMS web portal using its web services framework / Web API. This is for development and educational purposes only running locally. You will at least want to make sure that you have SSL enabled for your DNN Web Services in a real world scenario.
Requirements
- Microsoft Visual Studio
- DNN 7 [read my DotNetNuke 7 blog post to help you get started]
- RestSharp
Create a New Windows Forms Project
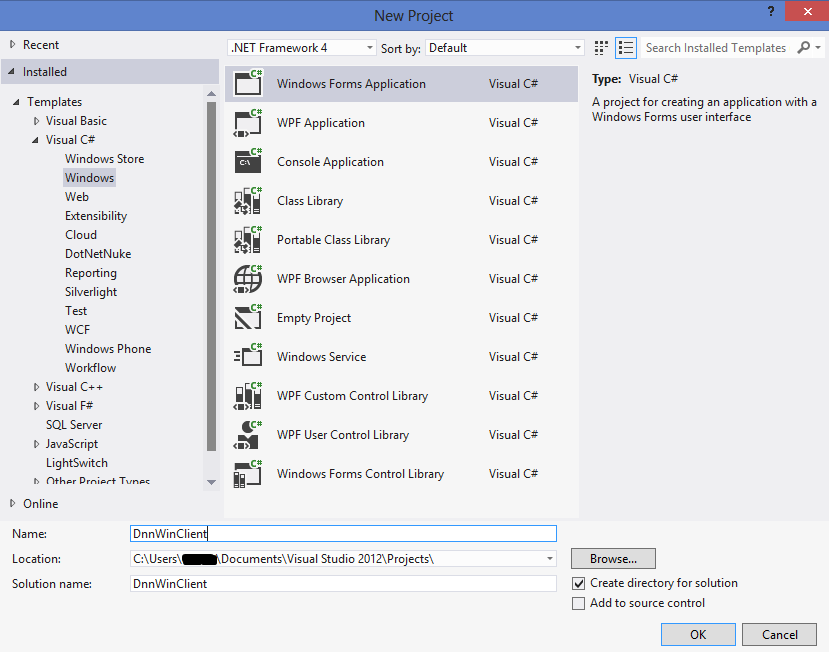
DnnWinClient - Windows Forms Project
While in the Form1.cs[Design] workspace, open the Toolbox and drag a TextBox and Label over to Form1 as shown below
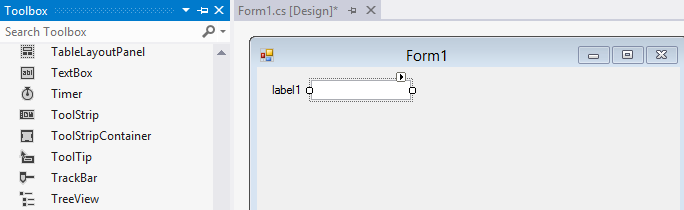
Form1 - Add Controls
Select the TextBox and then select F4 to bring up its Properties. Change the Name of the TextBox control to txtSite as shown below. Select the Label control, bring up its Properties, and Name it lblSite, set its Text to Site.
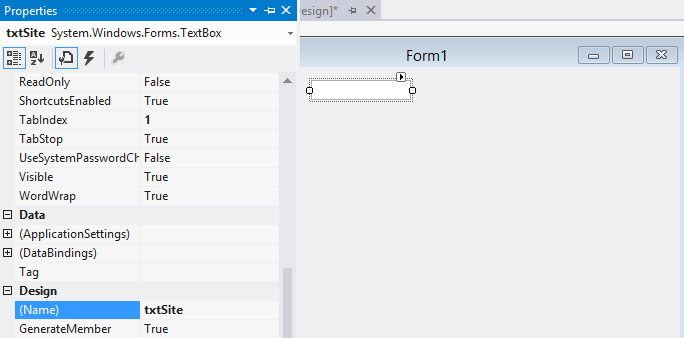
Form1 - TextBox Properties
Repeat the steps adding these controls to the form and setting the respective Properties of each as needed:
Labels
-
Name: lblUsername Text: Username
-
Name: lblPassword Text: Password
-
Name: lblRoute Text: Route
-
Name: lblResponse Text: Response
Text Boxes
-
Name: txtUsername
-
Name: txtPassword
UseSystemPasswordChar: True -
Name: txtRoute
-
Name: txtResponse
Multiline: True
For simplicity, we will just set the Text property of the Text Box controls to display our default values.
Defaults
-
Name: txtSite Text: http://dnn7 (your DNN website Url)
-
Name: txtRoute Text: DesktopModules/Services/API/TestAuth
Add a Button control so we can make a connection to the DNN CMS from our Windows Client. Name: txtButton, Text: Connect. Almost done with the design, select the form, and set its Text to DNN Client. Position and resize the Form, Labels, Text Boxes and Button to your liking making sure you have given the txtResponse Text Box enough space to display the response from the DNN web service. Here is how my form looks after some dragging and sizing of the form and its controls.
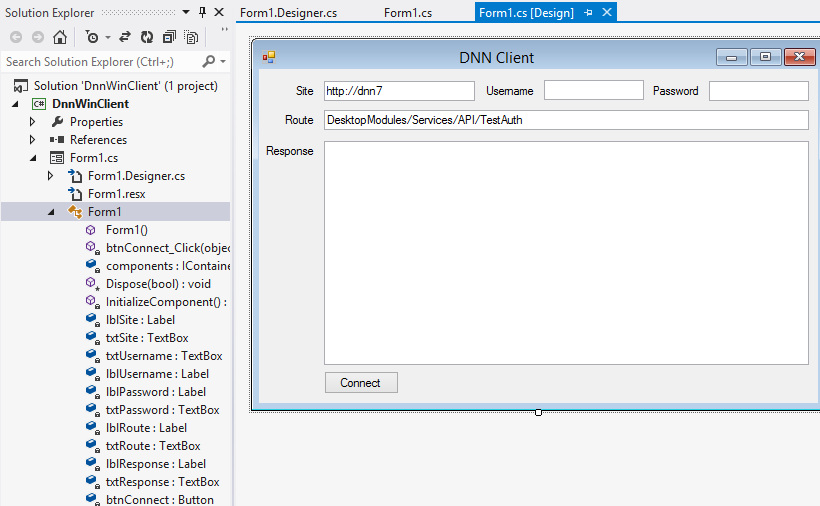
DnnWinClient - Form1.cs Design
Note the expanded Form1 node in Solution Explorer, the order of the controls is determined by their TabIndex property value.
If everything looks good, now is a good time to Save All (Ctrl+Shift+S) and Build (Ctrl+Shift+B) your Solution.
RestSharp
RestSharp is a Simple REST and HTTP API client for .NET that makes building the requests easy and efficient. To install RestSharp into the solution, I prefer NuGet. From the menu In Visual Studio, select Tools > Library Package Manager > Package Manager Console. Then run the following command:
PM> Install-Package RestSharp
Connect Code
Double click on the Connect button (btnConnect) to stub out a btnConnect_Click method in the Form1 class. Copy and Paste the following code into the method:
var domain = txtSite.Text;
var username = txtUsername.Text;
var password = txtPassword.Text;
var route = txtRoute.Text;

var apiUrl = string.Format("{0}/{1}", domain, route);

IRestRequest request = new RestRequest();
var client = new RestClient
{
    BaseUrl = apiUrl,
    Authenticator = new HttpBasicAuthenticator(username, password),
};
IRestResponse response = client.Execute(request);

txtResponse.Text = response.Content;
After removing the unused usings, adding RestSharp and a application/json request header, here is what the entire class should look like:
using System;
using System.Windows.Forms;
using RestSharp;

namespace DnnWinClient
{
    public partial class Form1 : Form
    {
        public Form1()
        {
            InitializeComponent();
        }

        private void btnConnect_Click(object sender, EventArgs e)
        {
            var domain = txtSite.Text;
            var username = txtUsername.Text;
            var password = txtPassword.Text;
            var route = txtRoute.Text;

            var apiUrl = string.Format("{0}/{1}", domain, route);

            IRestRequest request = new RestRequest();
            //We want our response in Json format
            request.AddHeader("Content-type", "application/json; charset=utf-8");
            var client = new RestClient
            {
                BaseUrl = apiUrl,
                Authenticator = new HttpBasicAuthenticator(username, password),
            };
            IRestResponse response = client.Execute(request);

            txtResponse.Text = response.Content;
        }
    }
}
Save All (Ctrl+Shift+S) and Build (Ctrl+Shift+B) the Solution. We our now done with our simple DNN Windows Client. Now let’s move onto the web services class library.
Setup DNN Web Services
DotNetNuke (DNN) will need a Web API service endpoint created to allow the Windows Client to communicate with the CMS. See this blog post for info on how to build a DNN Web Services Framework class library.
RouteMapper.cs
using System;
using System.Web.Http;
using DotNetNuke.Web.Api;

namespace WebServices
{
    public class RouteMapper : IServiceRouteMapper
    {
        public void RegisterRoutes(IMapRoute mapRouteManager)
        {
            mapRouteManager.MapHttpRoute(
                moduleFolderName: "Services",
                routeName: "Default",
                url: "{controller}/{id}",
                defaults: new { id = RouteParameter.Optional },
                namespaces: new[] { "WebServices" }
            );
        }
    }
}
Create a model for the data we are returning to the client. In the Solution Explorer, right click on the WebServices project and select Add > New Folder and name it Models. Add this class to the Models folder:
Models.User.cs
using System;

namespace WebServices.Models
{
    class User
    {
        public string FirstName { get; set; }
        public string Email { get; set; }
        public bool IsSuperUser { get; set; }
        public string LastName { get; set; }
        public int PortalID { get; set; }
        public int UserID { get; set; }
    }
}
Create a DNN API controller for the endpoint that returns the model data to the client. In the Solution Explorer, right click on the WebServices project and select Add > Class and name it TestAuthController.
TestAuthController.cs
using System;
using System.Net;
using System.Net.Http;
using System.Web.Http;
using DotNetNuke.Web.Api;

namespace WebServices
{
    public class TestAuthController : DnnApiController
    {
        [DnnAuthorize]
        public HttpResponseMessage Get()
        {
            //map UserInfo to User object we are returning
            Models.User user = new Models.User
            {
                Email = this.UserInfo.Email,
                IsSuperUser = this.UserInfo.IsSuperUser,
                FirstName = this.UserInfo.FirstName,
                LastName = this.UserInfo.LastName,
                PortalID = this.UserInfo.PortalID,
                UserID = this.UserInfo.UserID
            };
            return Request.CreateResponse(HttpStatusCode.OK, user);
        }

    }
}
Build the project making sure that the output is set to your DNN website root bin folder. For more information, refer to this blog post DotNetNuke 7. Open up your local DNN website in a browser to setup the DNN Web Services you just built.
Now for the moment of truth, Start the DnnWinClient and enter your DNN Username, Password and click Connect. The Response should contain the expected user info.
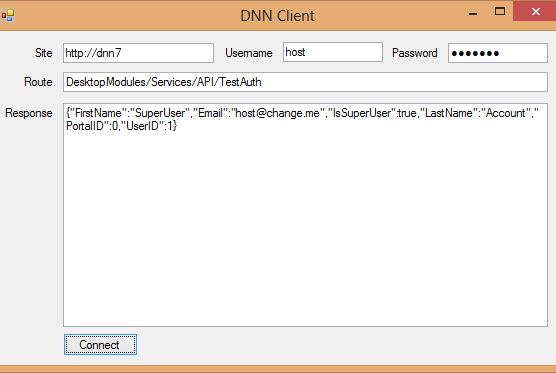
DnnWinClient - Running
Troubleshooting
If the PortalID and UserID values are -1 and the other values are null, check your DNN website web.config modules node. You may need the runAllManagedModulesForAllRequests attribute set to true. In theory it has a performance impact, in practice, IIS should already be doing this. For more info, refer to this blog post by Rick Strahl: ASP.NET Routing not working on IIS 7.0
web.config - Replace
<modules>
web.config - With
<modules runAllManagedModulesForAllRequests="true">
This project is available for browsing and download at GitHub