
Completely Blank (no css) _s WordPress Starter Theme
This post documents how to take the WordPress Starter Theme _s or underscores, if you like and build only the CSS components you want using Webpack 4. This modern toolset also includes autoprefixer and browserlist support.
You might only want the normalizer and accessibility modules, any combination of modules, or none at all to start with a completely blank slate. This build process will give you a solid foundation and all the latitude you need.
Pre-requisites
You will need NodeJS with NPM installed. We’re also going to use the terminal to issue the build command to watch for file changes in development mode. If you haven’t done any front end development using these tools, there is no better time than now to get started.
Secondly, you will need the _s theme. The easiest way to get that is by using the the form to generate it for you at underscores.me. Be sure to select the Advanced Options so you can tick the _sassify! check box. For example, in the image below, we chose the name blank for the theme.
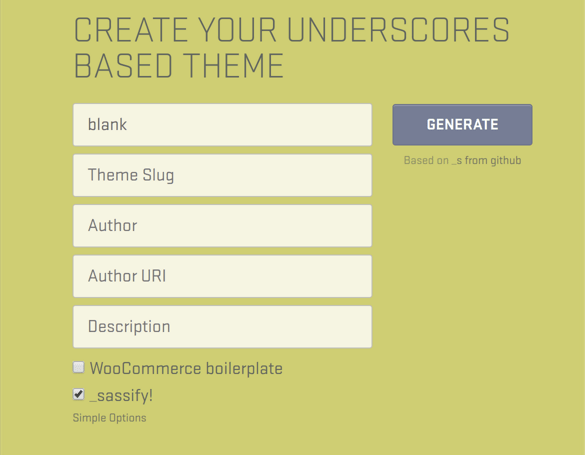
_s generate theme form including sass
Optionally, the _s theme can be cloned or forked from it’s repo on GitHub. Although not as easy as using the generate form, the README.md includes instructions for renaming the _s namespace.
Copy the generated underscores based theme into wp-content/themes. For a good local WordPress development environment, read my post, WordPress from Development to Production using Docker.
Webpack 4
New in Webpack 4 is the default src entrypoint folder. This folder will need to be created in the in the generated theme root. For example, wp-content/themes/blank/src.
Move the sass folder in the generated theme into the newly created src folder.
Webpack needs a javascript entrypoint file. In the src folder, create a folder named js and create a index.js file in it.
The remainder of this section will be done using the terminal. Navigate to the theme folder, blank in this example to initialize the project with npm init. e.g.,
cd wp-content/themes/blank

# init npm project
npm init
Now install the npm packages with option --save-dev to update the package.json as each package installs.
npm i webpack --save-dev

npm i webpack-cli --save-dev

npm i autoprefixer --save-dev

npm i babel-core --save-dev

npm i babel-loader --save-dev

npm i babel-preset-env --save-dev

npm i css-loader --save-dev

npm i mini-css-extract-plugin --save-dev

npm i node-sass --save-dev

npm i optimize-css-assets-webpack-plugin --save-dev

npm i postcss-loader --save-dev

npm i resolve-url-loader --save-dev

npm i sass-loader --save-dev

npm i style-loader --save-dev

npm i url-loader --save-dev

npm i webpack-merge --save-dev
In the example above, the
npm installshorthand alias,npm iis being used. Additionally, the shorthand alias for--save-dev,-Dcan be used.
While in the blank theme folder, create a new folder named webpack for the build configuration. In that folder create these 3 javascript files, base.config.js, dev.config.js and prod.config.js. You can do this in the terminal as follows.
mkdir webpack

cd webpack

touch base.config.js

touch dev.config.js

touch prod.config.js
We’re going to need just a couple more files in the blank theme folder (otherwise known as our project root) for a couple module specific configurations. Create a file named .babelrc and a file named postcss.config.js. For example,
# from blank folder

touch .babelrc

touch postcss.config.js
At this point, the theme folder structure should include a node_modules folder, package.json file, entrypoint src folders, .babelrc, .postcss.config.js and webpack config folder. e.g.,
- blank
- 404.php
- archive.php
- .babelrc
- comments.php
- footer.php
- functions.php
- inc
- index.php
- js
- languages
- layouts
- node_modules
- package.json
- page.php
- phpcs.xml.dist
- postcss.config.js
- rtl.css
- screenshot.png
- search.php
- sidebar.php
- single.php
- src
- js
- index.js
- sass
- js
- style.css
- template-parts
- webpack
- base.config.js
- dev.config.js
- prod.config.js
If you want to skip ahead or browse the completed tutorial source code, checkout the blank branch of my _s fork.
Now it’s time to add some code to the configuration files we created.
Add the base webpack configuration code to the weback/base.config.js which is common to both development (dev) and production (prod).
base.config.js
const path = require('path');
const MiniCssExtractPlugin = require("mini-css-extract-plugin");

module.exports = {
  context: path.resolve(__dirname, '../src'),
  entry: {
    app: './js/index.js'
  },
  plugins: [
    new MiniCssExtractPlugin({
      filename: "../style.css",
    })
  ],
  module: {
    rules: [
      {
        test: /\.(css|scss)$/,
        use: [
          MiniCssExtractPlugin.loader,
          'css-loader',
          {
            loader: 'postcss-loader' },
          {
            /* for ~slick-carousel/slick/slick-theme.scss */
            loader: 'resolve-url-loader' },
          {
            /* for resolve-url-loader:
                source maps must be enabled on any preceding loader */
            loader: 'sass-loader?sourceMap' }
        ]
      }
    ]
  }
}
Add the development webpack configuration code to weback/dev.config.js.
dev.config.js
const baseConfig = require('./base.config.js');
const merge = require('webpack-merge');

module.exports = merge(baseConfig, {
  devtool: 'eval-source-map',
});
Add the production webpack configuration code to weback/prod.config.js.
prod.config.js
const baseConfig = require('./base.config.js');
const merge = require('webpack-merge');
const OptimizeCSSAssetsPlugin = require("optimize-css-assets-webpack-plugin");

module.exports = merge(baseConfig, {
    optimization: {
        minimizer: [
          new OptimizeCSSAssetsPlugin({})
        ]
    }
});
The next page covers the code for the javascript entrypoint, remaining configuration files, adding npm scripts, updating the theme Sass and running the builds to view the respective style.css changes.