
Grunt JavaScript Task Runner
This tutorial describes how to setup and use the Grunt JavaScript task runner to automate repetitive tasks such as minification and compilation. Grunt is installed using npm, the Node.js package manager. You will also need Git to work with the tagged source code. This makes it easy to reset and compare your working copy of the code at each step. I discovered commit tags while using the AngularJS tutorial.
If you have not done so already, make sure that you have Node.js, Grunt CLI and Git installed. For Windows systems, after installing Git, you may decide to use the Git bash shell for your CLI (command line interface) instead of the Command Prompt.
Install Grunt’s command line interface (CLI) globally.
#install grunt CLI
npm install -g grunt-cli
Source Code
Using Git, clone the GruntTutorial repository. This contains all the source code for the tutorial. As you work through the tutorial, you will be instructed to use git to reset the source code so it matches the step at that point. This will revert the source code to it’s original state for the respective tag and thus overwrite any changes you have made to it.
# git clone creates the GruntTutorial directory in your current directory
git clone https://github.com/jimfrenette/GruntTutorial.git

# reset to step 0
git checkout -f step-00
Step 1: Node.js Package
# reset to step 1
git checkout -f step-01
A npm (nodejs package manager) package.json file is added to the project root for npm to read its structure and know what to do when installing it.
Update: 12-20-2014 — Interactively create a package.json file with the npm init command. More information available at the npm cli commands doc.
# create package.json
npm init
Grunt and node modules are installed per the package.json dependencies.
package.json
{
  "name": "grunt-tutorial",
  "version": "0.1.0",
  "devDependencies": {
    "grunt": "~0.4.1",
    "grunt-contrib-jshint": "~0.6.3",
    "grunt-contrib-nodeunit": "~0.2.0",
    "grunt-contrib-uglify": "~0.2.2"
  }
}
These node_modules are already included in the step-01 source. To verify the process on your own, reset the tutorial source code to step-00 and run these npm install commands:
GruntTutorial - bash
# install the latest Grunt in your project folder
npm install grunt --save-dev

# install dependencies per package.json
npm install
Step 2: Combine and Minify Javascript files
# reset to step 2
git checkout -f step-02
Gruntfile.js is added to root of the project to specify the modules configuration, define tasks and load plugins. This Gruntfile.js specifies an uglify plugin to perform JavaScript minification. The banner option creates a comment on the first line of the minified file that is output. The JavaScript source (src) and destination (dest) paths are set in the build properties. Since our build source path has a wildcard * before the js filename extension, all of the js files in that directory will be minified into a single JavaScript file named grunt-tutorial.min.js as specified in the build destination property.
module.exports = function(grunt) {
  'use strict';
  // Project configuration.
  grunt.initConfig({
    pkg: grunt.file.readJSON('package.json'),
    uglify: {
      options: {
        banner: '/*! <%= pkg.name %> <%= grunt.template.today("yyyy-mm-dd") %> */\n'
      },
      build: {
        src: 'src/js/*.js',
        dest: 'build/<%= pkg.name %>.min.js'
      }
    }
  });
  // Load the plugin that provides the "uglify" task.
  grunt.loadNpmTasks('grunt-contrib-uglify');
  // Default task(s).
  grunt.registerTask('default', ['uglify']);
};
Time to test our Gruntfile.
# run the default task
grunt
You should recieve a message like this
Running "uglify:build" (uglify) task
File "build/js/grunt-tutorial.min.js" created.

Done, without errors.
Step 3: Compass and Watch Plugin Install
# reset to step 3
git checkout -f step-03
OS X / Linux
For the Sass compile with the Compass & Watch Grunt plugins, you will need to have Ruby, Sass, and Compass version 0.12.2 or greater installed. Ruby comes pre-installed on OS X.
Windows
For the Sass compile with the Compass & Watch Grunt plugins, you will need to have the RubyInstaller for Windows. As of this writing, use Ruby 1.9.3 installers. These provide a stable language and a extensive list of packages (gems) that are compatible and updated. During the setup, check the option to Add Ruby executables to your PATH. After installing Ruby, install Sass and Compass using the Start Command Prompt with Ruby.
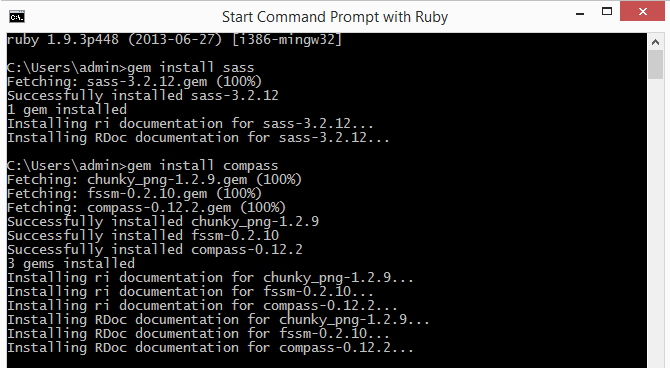
Start Command Prompt with Ruby
Install compass and watch Grunt plugins
By running these npm install commands with –save-dev, the package.json file will automatically be updated to include these two new dependencies.
GruntTutorial - bash
# install plugins and update package.json
npm install grunt-contrib-compass --save-dev

npm install grunt-contrib-watch --save-dev
Compass and watch Grunt plugins added to the package.json devDependencies.
package.json
{
  "name": "grunt-tutorial",
  "version": "0.1.0",
  "devDependencies": {
    "grunt": "~0.4.2",
    "grunt-contrib-jshint": "~0.6.3",
    "grunt-contrib-nodeunit": "~0.2.0",
    "grunt-contrib-uglify": "~0.2.2",
    "grunt-contrib-compass": "~0.6.0",
    "grunt-contrib-watch": "~0.4.4"
  }
}
Step 4: Sass
# reset to step 4
git checkout -f step-04
Sass .scss files added to the source (src) directory and the Gruntfile.
Gruntfile.js
module.exports = function(grunt) {
  'use strict';
  // Project configuration.
  grunt.initConfig({
    pkg: grunt.file.readJSON('package.json'),
    compass: {
      dev: {
        // http://compass-style.org/help/tutorials/configuration-reference/#configuration-properties
        // these options will override (or extend) config.rb settings.
        options: {
          cssDir: 'build/css/',
          sassDir: 'src/sass/'
        }
      }
    },
    uglify: {
      options: {
        banner: '/*! <%= pkg.name %> <%= grunt.template.today("yyyy-mm-dd") %> */\n'
      },
      build: {
        src: 'src/js/*.js',
        dest: 'build/js/<%= pkg.name %>.min.js'
      }
    },
    watch: {
      css: {
        files: '**/*.scss',
        tasks: ['compass']
      }
    }
  });
  // Load the plugins.
  grunt.loadNpmTasks('grunt-contrib-compass');
  grunt.loadNpmTasks('grunt-contrib-uglify');
  grunt.loadNpmTasks('grunt-contrib-watch');
  // Default task(s).
  grunt.registerTask('default', ['uglify', 'watch']);
};
Time to test our Gruntfile.
# run the default task(s)
grunt
Step 5: Compile Sass
# reset to step 5
git checkout -f step-05
The CLI / Terminal shows the status of the Grunt tasks that are run.
# run the default task(s)
grunt

Running "uglify:build" (uglify) task
File "build/js/grunt-tutorial.min.js" created.

Running "watch" task
Waiting...OK
Edit and save one of the Sass (.scss) files. The watch task waits for changes to files and then fires a task. In our Gruntfile, the watch is configured to run the the compass task whenever a .scss file is updated. The compass task is configured to compile the Sass files specified in the sassDir property (src/sass/) and output to the cssDir specified (build/css/).
CLI / Terminal output from changed Sass file.
>> File "src/sass/reset.scss" changed.

Running "compass:dev" (compass) task
overwrite build/css/reset.css (0.02s)
unchanged src/sass/style.scss
Compilation took 0.053s

Done, without errors.
Completed in 0.717s at Sat Nov 23 2013 17:14:57 GMT-0500 (EST) - Waiting...
Source Code
December 2014 — New Page added to cover using a static web server with live browser reloading.
Step 6: Web Server
If you already have grunt-cli installed, run the following to update the package to the latests version.
# update grunt
npm update -g grunt-cli
Install the grunt-contrib-connect plugin to run a static web server over http.
# install grunt plugin
npm install grunt-contrib-connect --save-dev
Update the Gruntfile from page 1 to configure, load and run the connect server in addition to the existing default tasks. The connect server configuration will launch a server in the default browser at http://localhost:8000 when the connect:server task is run.
Add the connect web server configuration object.
connect: {
  server: {
    options: {
      port: 8000,
      hostname: 'localhost',
      open: true
    }
  }
}
Add grunt-contrib-connect loading and connect:server task registration.
// Load the plugins.
grunt.loadNpmTasks('grunt-contrib-connect');
grunt.loadNpmTasks('grunt-contrib-uglify');
grunt.loadNpmTasks('grunt-contrib-watch');
// Default task(s).
grunt.registerTask('default', ['uglify', 'connect:server', 'watch']);
View the updated Step 6 Gruntfile.js
Step 7: Live Reload
Live reload automatically refreshes the browser when changes are made to the file system. Included with the grunt-contrib-connect plugin is connect-livereload making this task easy to add to the existing Gruntfile.js
Gruntfile.js
The updated Gruntfile with livereload: true added to both the watch and connect:server options.
module.exports = function(grunt) {
  'use strict';
  // Project configuration.
  grunt.initConfig({
    pkg: grunt.file.readJSON('package.json'),
    compass: {
      dev: {
        // http://compass-style.org/help/tutorials/configuration-reference/#configuration-properties
        // these options will override (or extend) config.rb settings.
        options: {
          cssDir: 'build/css/',
          sassDir: 'src/sass/'
        }
      }
    },
    // connect web server configuration
    connect: {
      server: {
        options: {
          port: 8000,
          hostname: 'localhost',
          open: true,
          livereload: true
        }
      }
    },
    uglify: {
      options: {
        banner: '/*! <%= pkg.name %> <%= grunt.template.today("yyyy-mm-dd") %> */\n'
      },
      build: {
        src: 'src/js/*.js',
        dest: 'build/js/<%= pkg.name %>.min.js'
      }
    },
    watch: {
    options: {
    livereload: true
    },
      css: {
        files: '**/*.scss',
        tasks: ['compass']
      }
    }
  });
  // Load the plugins.
  grunt.loadNpmTasks('grunt-contrib-compass');
  grunt.loadNpmTasks('grunt-contrib-connect');
  grunt.loadNpmTasks('grunt-contrib-uglify');
  grunt.loadNpmTasks('grunt-contrib-watch');
  // Default task(s).
  grunt.registerTask('default', ['uglify', 'connect:server', 'watch']);
};
This project is available for browsing and download at GitHub:
https://github.com/jimfrenette/GruntTutorial
Grunt Tips and Tricks
Running a Grunt Task
It is not necessary to register a Grunt task in order to run it. If the task has been defined in the config, call it with the grunt command.
# run specific task
grunt uglify
Therefore, when registering a task with grunt.registerTask, do not use a task alias that matches a task name already defined in grunt.initConfig. The resulting recursive function will generate a maximum call stack size exceeded warning and the task will abort.
Uninstalling Grunt Modules
Node.js package manager (npm) is responsible for installing and uninstalling modules. For globally installed modules, npm uninstall -g modulename
# uninstall grunt-contrib-uglify
npm uninstall grunt-contrib-uglify
This does not remove the modules devDependencies property reference in package.json, that needs to be removed nmaually, otherwise npm install will reinstall the module.