
Hugo + Node.js Koa App Connected to MongoDB Part II
In part 2 of the series, we’re adding the site content to a search.json file when the Hugo static site is built and importing it into a MongoDB collection. Then in the Node.js Koa app, we create an API endpoint that returns search results from the collection in MongoDB.
This tutorial a continuation of Hugo + Node.js Koa App Connected to MongoDB and thus requires that all of the steps in it have been completed prior to starting this one. The source code for this series is on GitHub.
Environment Settings
To make things easier to change and keep track of, add an .env file to maintain project settings. For example,
.env
### PROJECT SETTINGS

DEV_PROJECT_NAME=hkm
DEV_PROJECT_HOST=localhost
Now update the docker-compose.yml file to use the .env file settings as follows.
- Replace
hkm_with${DEV_PROJECT_NAME}_ - Replace
localhostwith${DEV_PROJECT_HOST}
NoSQL Client
While we’re updating the docker-compose.yml file, let’s add a MongoDB NoSql Client Docker container to the stack so we can manage and administer MongoDB using a GUI.
In the docker-compose.yml file, add ths block below the mongo service. The mongoclient service we’re adding uses the mongoclient docker image.
docker-compose.yml
  mongoclient:
    image: mongoclient/mongoclient
    container_name: "${DEV_PROJECT_NAME}_mongoclient"
    labels:
      - 'traefik.backend=${DEV_PROJECT_NAME}_mongoclient'
    ports:
      - "3000:3000"
    volumes:
      - mongoclientdata:/data/db
And at the bottom of the file, add the mongoclientdata named volume under mongodata to persist any saved data changes made using the container.
docker-compose.yml
volumes:
  mongodata:
  mongoclientdata:
Bring up the stack using docker-compose up and open the Nosqlclient in a browser
at. For example, localhost:3000
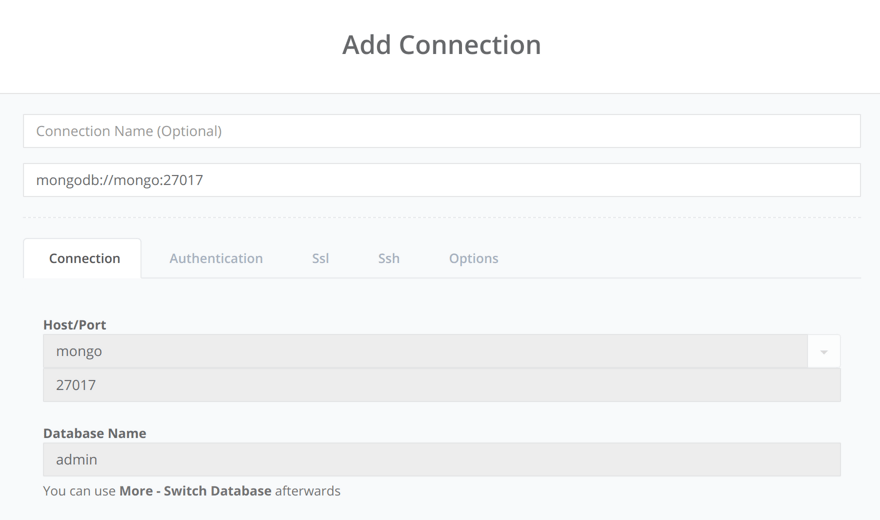
In the menu, select Connect > Create New
Copy the connStr value from api/src/server/index.js and paste that in the Connection URL input of the Add Connection form.
Switch to the chinook database and you should be able to browse the collections.
We will use this client later to import a search index json into a new database.
Search Index
These next steps will allow us to create a search index json file that can be imported into the MongoDB in order to create an api endpoint for free text search of the static website content.
Ceate a layout to output the search index json. For example, in the common /layouts folder, create a new file named list.search.json as follows:
list.search.json
{{- $.Scratch.Add "search" slice -}}
{{- range $index, $element := (where .Site.Pages "Kind" "page") -}}
    {{- $.Scratch.Add "search" (dict "title" $element.Title "uri" $element.Permalink "tags" $element.Params.tags "section" $element.Section "content" $element.Plain "summary" $element.Summary "date" ($element.Date.Format "2006-01-02")) -}}
{{- end -}}
{{- $.Scratch.Get "search" | jsonify -}}
Update the site configuration by adding a Search output. In order to add another output, we also need to include the pre-existing HTML and RSS output configuration settings. Update the config.toml as follows to add the Search output and format settings.
config.toml
...

[outputs]
home = ["HTML", "RSS", "Search"]

[outputFormats.Search]
baseName = "search"
isPlainText = true
mediaType = "application/json"
notAlternative = true
Note that an ellipsis … in the code snippets are not a part of the code and are there only to denote code that is being skipped and not applicable to the example.
Generate the site and you should now have a search.json file in the root of the public folder.
cd www
hugo
Content
For testing, I used free public domain book excerpts which have plenty of text to populate the search index. For example, content folder
MongoDB - Import Search Index
Option A
Copy the search.json file into the mongo containers /home directory. e.g.,
docker cp www/public/search.json hkm_mongo:/home/search.json
Shell into the running MongoDB container, e.g.,
# start/restart environment as needed
docker-compose up -d

docker exec -it hkm_mongo /bin/bash
Import the search.json file into a database named search and a Collection named Content using the --jsonArray option. e.g.,
cd home

mongoimport --db search --collection Content --file search.json --jsonArray
Your output should include these responses afte a timestamp
connected to: mongodb://localhost/
3 document(s) imported successfully. 0 document(s) failed to import.
Option B (Rebuild Mongo Image)
This method requires removal of the pre-existing
mongodatavolume.
If the Docker image finds any files with the .sh extensions .sh inside of the /docker-entrypoint-initdb.d folder, it will execute them. Copy the search.json and a shell script to run the mongoimport command into the docker-entrypoint-initdb.d using the mongo.dockerfile. For example,
cp www/public/search.json docker/entrypoint-initdb.d/
Create a shell script in the docker/entrypoint-initdb.d folder containing this mongoimport command:
mongoimport --db search --collection Content --file /docker-entrypoint-initdb.d/search.json --jsonArray
Rebuild the docker image. e.g.,
# rebuild
docker-compose build
MongoDB - Text Search
Create a text index on both the title and content fields. e.g.,
db.Content.createIndex( { title: "text", content: "text" } )
To run the MongoDB commands, use the Nosqlclient at localhost:3000 or shell into the container, e.g.,
docker exec -it hkm_mongo /bin/bashand runmongo. Be sure to switch to thesearchdatabase, e.g.,use search
Use the $text query operator to perform a text search. e.g.,
db.Content.find( { $text: { $search: "wonderland" } } )
Content Data Model
In the src/server/search folder, create the content data model. For example,
content.js
const mongoose = require('mongoose');
const Schema = mongoose.Schema;

/*
 notice there is no ID. That's because Mongoose will assign
 an ID by default to all schemas

 by default, Mongoose produces a collection name by passing the model name to the utils.toCollectionName method.
 This method pluralizes the name Content to Contents.
 Set this option if you need a different name for your collection.
 e.g., `collection: 'Content'`
*/

const ContentSchema = new Schema({
    content: String,
    date: Date,
    section: String,
    summary: String,
    tags: Array
},{
    collection: 'Content'
});

const search = mongoose.connection.useDb('search');

module.exports = search.model('Content', ContentSchema);
Search Route
In the src/server/routes/search folder, create the api/search route. For example,
content.js
const Router = require('koa-router');

const router = new Router();
const BASE_URL = `/api/search`;

const Content = require('../../search/content');

function getContent(phrase) {

    // put quotes around search phrase
    phrase = JSON.stringify(phrase);

    return new Promise((resolve, reject) => {
        var query = Content.find({ $text: { $search: phrase } });
        query.exec((err, results) => {
            if (err) {
                resolve(err);
            } else {
                resolve(results);
            }
        });
    });
}

router.get(BASE_URL + '/content/:phrase', async (ctx) => {
    try {
        ctx.body = await getContent(ctx.params.phrase);
    } catch (err) {
        console.log(err)
    }
})

module.exports = router;
App Entrypoint
Update the Koa application entrypoint, src/server/index.js to include and use the new content text search route.
index.js
const Koa = require('koa');
const mongoose = require('mongoose');            if (err) return handleError(err);
            resolve(results);

...

const contentRoutes = require('./routes/search/content');

/**
 * Koa app */
const app = new Koa();
const PORT = process.env.PORT || 1337;
const server = app.listen(PORT, () => {
    console.log(`Server listening on port: ${PORT}`);
});

/**
 * MongoDB connection */
const connStr =  'mongodb://mongo:27017/default';
mongoose.connect(connStr);
const db = mongoose.connection;
db.on('error', console.error.bind(console, 'connection error:'));
db.once('open', () => {
    console.log('connected');
});

...

app.use(contentRoutes.routes());

module.exports = server;
API Test
In the project root, run docker-compose up -d which starts the containers in the background and leaves them running. The -d is for detached mode.
To monitor docker output in the terminal, run
docker-compose upwithout the disconnected (-d) option, e.g.,docker-compose up.
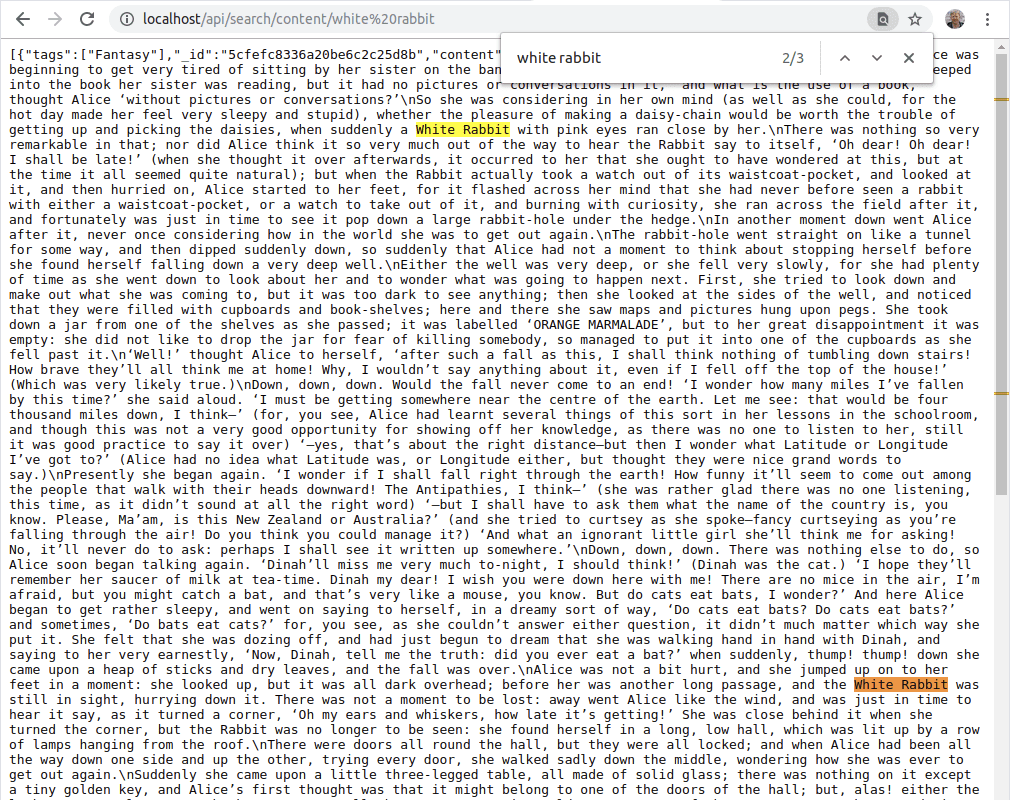
To test the content search API endpoint, load [localhost/api/search/content/white rabbit](http://localhost/api/search/content/white rabbit) in a browser to see the json response. In this example, we’re searching for “white rabbit”.
All of the source code for this tutorial is available on GitHub.
Source Code
Part 2 of 2 in the hugo-koa-mongo series.